4 Step Guide to Replacing Trailer Lights

Installing/replacing trailer lights

Having issues with faulty trailer lights or need to install new ones? Having functional trailer lights is crucial for safety on the road and as such, you should check your lights every time you use your trailer. Here’s a step-by-step guide to installing or replacing lights which will have you back in business in no time.

Equipment needed:

  • New set of 12V lights
  • Wire strippers
  • Electrical tape or heat shrink
  • Basic hand tools

Step one – Remove the old lights

  • Unscrew the lights and then disconnect or cut the wires just behind the connection.
  • Make sure the remaining wiring is still in good condition, and then strip 1-2cm of insulation from all wires.

Step two – Mount the new lights

  • Connect your trailer to the towing vehicle.
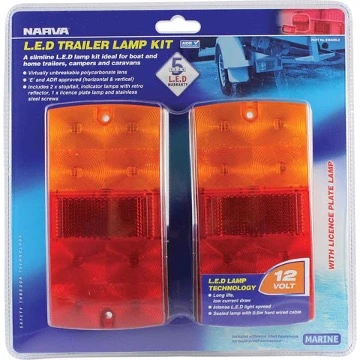
  • Mount one light to either side of the trailer, in the same location of the old lights. Make sure you take note of the requirement for the number plate light – one light in your kit will usually contain a clear plastic section on one side for this purpose.
  • Depending on your kit, the lights will have bolts already fitted, or holes ready for bolts. Align these with the holes on your trailer, slide the bolts or screws through and secure tightly.

trailer tail light narva fabplans

Step three – Connect the wiring

  • If you are using heat-shrink tubing, slide a strip over each existing wire before connecting them.
  • Connect the wires from the lights to the new wiring. You should connect each colour wire on the light to the corresponding wire of the same colour on the trailer wiring. If the colours don’t match, check with an auto-electrician before going any further.
  • Tighten the housing onto the trailer, applying a small amount of pressure to ensure connection with the earth wire, but not enough to crack the plastic housing.
  • Repeat for the second light.

wiring chart plug fabplans

Step four – Test the connections

  • Connect the trailer plug to the socket on the two vehicle and test all the lights.
  • At this point, it would be useful to have someone else turn on each light, one at a time, to test they are all functioning correctly. This includes the left indicator, right indicator, brake lights and reverse lights.
  • If everything is working correctly, slide the heat shrink over the joins and apply heat to seal. If you do not have heat shrink, you can seal the connections using electrical tape, which will help keep moisture and dirt from entering.

If you come across any issues with installation or replacement, make sure to consult an auto-electrician before heading out on the road.

Most brands offer lighting diagrams with their trailer light products, such as this one from Narva