Menu
$ AUD
-
$ AUD
-
$ NZD
-
$ USD
-
€ EUR
-
$ CAD
-
د.إ AED
-
$ ARS
-
R$ BRL
-
£ GBP
-
Ft HUF
-
₹ INR
-
kr. ISK
-
KSh KES
-
RM MYR
-
K PGK
-
₲ PYG
-
₱ PHP
-
zł PLN
-
₽ RUB
-
R ZAR
-
฿ THB
-
₺ TRY
This guide is for those who have only just begun dipping their toes into the fabrication world. Setting up your workshop at the start may seem daunting, but rest assured, you can get started with the basics that won’t break the bank. For many of Fabplans trailer and ute tray designs, the following basic tools are all you will need.
CAUTION: Exposure to the by-product of welding and grinding (welding fumes, grinding dust) can cause you harm. You should always operate in a well-ventilated area and wear a suitable mask where necessary.
Choosing which welder to purchase is probably going to be your biggest decision when it comes to tools, therefore, we will endeavour to provide you with the required information to make your choice easier.
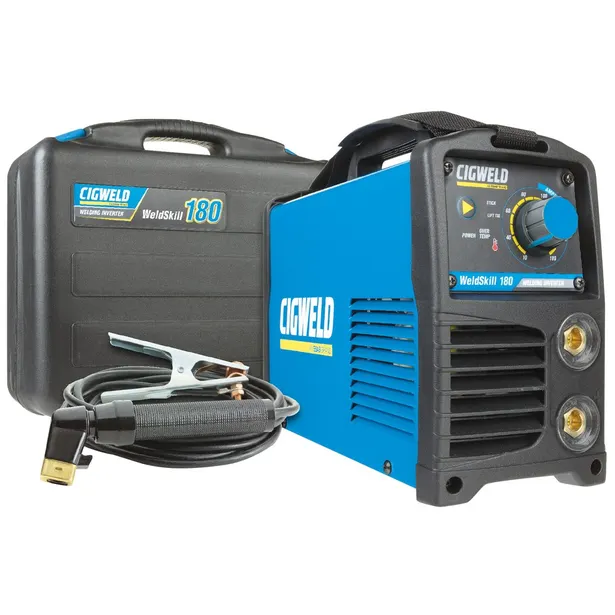
Arc (commonly known as ‘Stick’)
A welder like this one is very basic, but with some practice, you can achieve good quality welds.
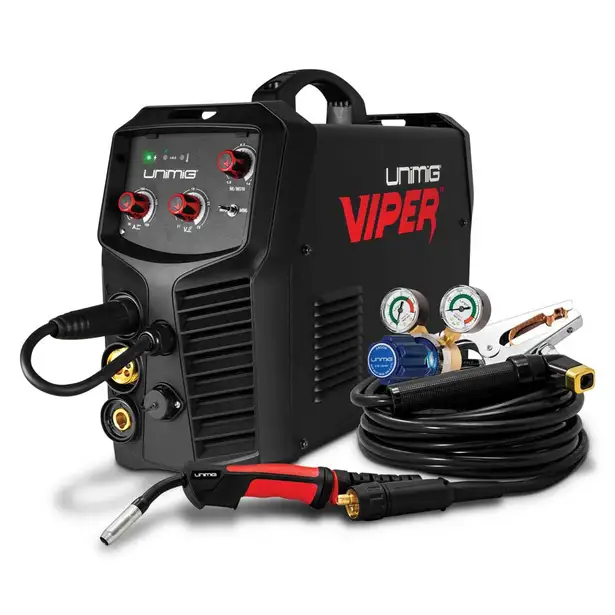
MIG (metal inert gas)
Many welders on the market these days can be used for both Stick and MIG (gas or gases)
First, we will look at ‘Stick’ as it is nearly always cheaper to purchase a stick welding machine than a MIG.
Stick welders are very basic and inherently, quite robust. This method of welding requires you to insert the electrode (welding rod) into the hand piece. No gas is required as the electrode is coated with a flux which creates a protective shield when welding. Note: gas in a welding process is used to protect the weld when in the molten state from air contaminants. Contaminants cause porosity and a weld with undesirable qualities.
Both MIG and stick provide high quality welds with very similar strength qualities. Preparation and practice are key to achieving a weld which has good penetration and is appealing to the eye.
| PROS | CONS |
|---|---|
|
Cheap to buy and setup. Purchase for under $500. |
Harder to achieve a good quality weld for the novice welder. |
|
No need for a gas cylinder. |
Need to continually replace the electrode. |
|
Lightweight, easy to move around. |
Need to remove the slag (by-product of stick welding) after each weld. |
|
Can weld in windy conditions. |
Can take longer to learn as you will experience the electrode sticking to the workpiece when initially creating the arc. |
Now let’s look at the MIG.
There are two forms of MIG welding applicable to the beginner, that we will cover. They are:
Both machines are pretty much the same. In many cases, you can use one machine for welding with gas and without – the welder setup however, will be different for each.
MIG uses a roll of ‘wire’ as the electrode which is fed by the welding machine into the handpiece. The most difficult part for a newcomer to learn is ‘dialling’ in the machine to suit your workpiece. When you purchase a new welder, the manufacturer will provide information for welding different thickness material to ensure the correct amps and wire feed is set. Once you start to get the hang of things you will come to know what settings are required for your task.
For this setup, the negative lead will be the earth (clamps to the workpiece) and the handpiece is the positive. When the trigger is pulled on the handpiece and the wire contacts your work, the metal bonding process begins. This form uses gas from a cylinder (to protect the weld from contaminants) which is also fed through the handpiece directly to the weld area creating that vital shield.
| PROS | CONS |
|---|---|
|
Easy form of welding to learn. |
More expensive to buy and operate. Purchase base-level machine for approx. $1,000. |
|
With little practice, a strong aesthetically appealing weld can be created. |
You will need to purchase both gas and wire. |
|
Less welding spatter than other methods. |
Can't weld in windy conditions. |
|
No slag to remove. |
Uses more consumables than stick welding (contact tip, tip shroud). |
And finally, let’s look at the gasless setup.
There are two main differences between gasless and gas. Gasless uses a wire with a flux core, removing the need for a gas cylinder, and the poles (negative and positive) are reverse. This means that the positive is connected to the workpiece and the negative to the handpiece. This method works like the stick welding process, but in this case, the flux is inside the wire.
| PROS | CONS |
|---|---|
|
No need to purchase a gas cylinder. |
More expensive to buy and operate. Purchase a base-level machine for approx. $1,000. |
|
Easy to learn. |
More welding spatter than other methods. |
|
With little practice, you can achieve a good quality weld. |
Need to wire brush the welds afterwards. |
|
Can weld in windy conditions. |
More consumables than stick welding. |
So, what would we recommend?
For the absolute beginner, your best bet is a Gasless MIG. You can often pick one up for around $1000. This method gives you the ‘best of both worlds’ – you can achieve good welds with little practice and you don’t need to continually purchase expensive gas.
This is our recommendation, but you can build any of our designs with any of the welding methods listed above.
Happy welding ⚡️